Enter keyword(s) to search Blogs
Click here to be taken to the original blog
Most Recent
Categories
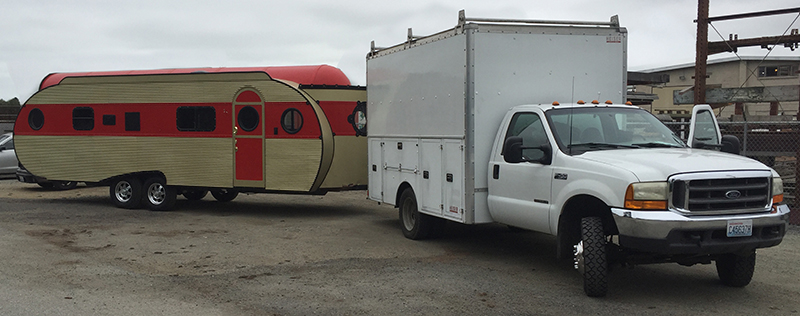
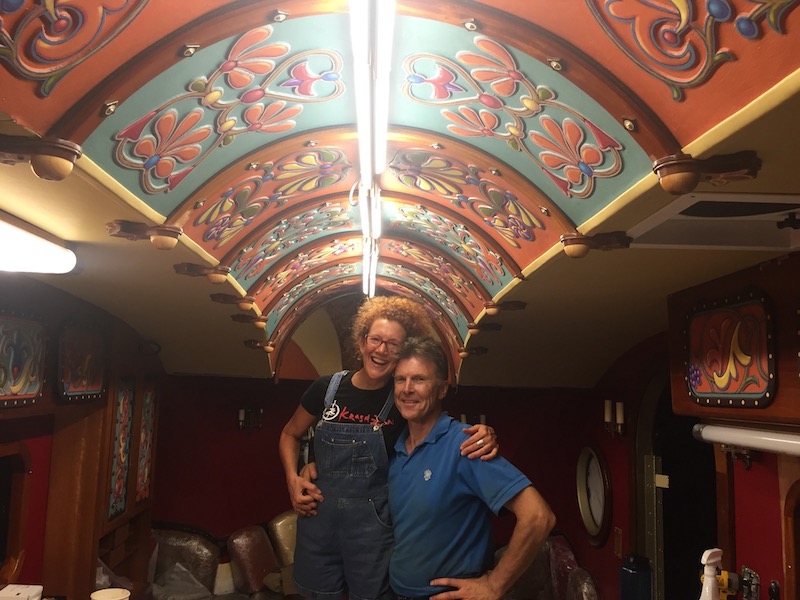
We have been customizing this 1956 Airfloat Land Yacht (which we’ve named “Talulah”) for the past eight years and the 1999 F450 diesel box truck/mobile shop (which we’ve named “Clyde”) for nearly four. Many photos of this project (before, during, and completed) can be seen on our website. Virtually all of the details in the trailer and truck were done with the aid of a ShopBot Desktop CNC router which resides in our truck (see our previous blog). The goal has been to create an efficient, elaborate, and fun traveling home and shop which allows us to express our DillUhlsional tendencies.
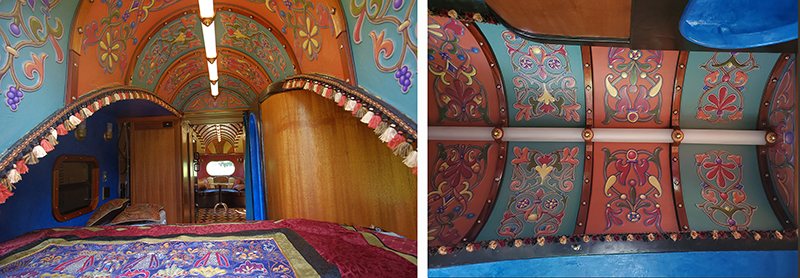
The three-dimensional nature of the interior paintings would not have been possible without the ShopBot Desktop CNC and VCarve Pro software.
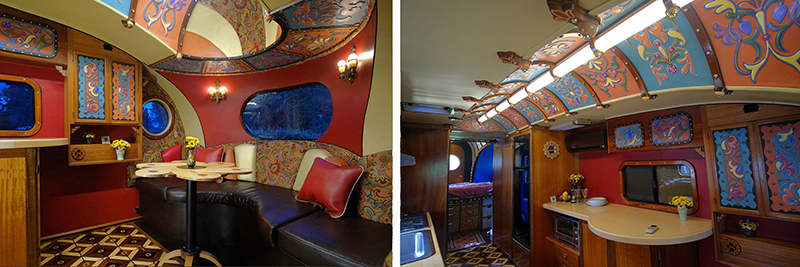
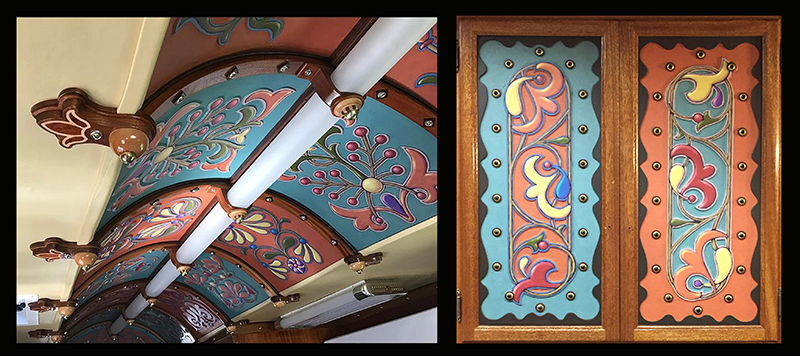
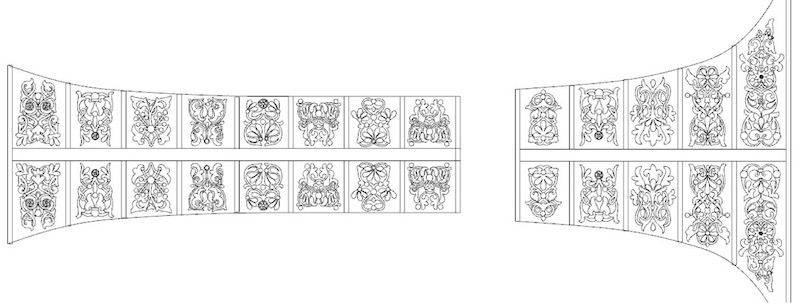
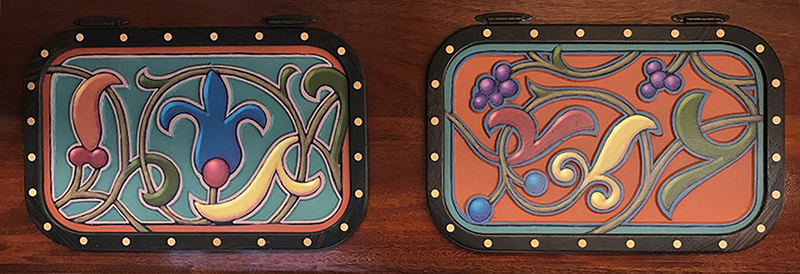
There are 40 hand-painted panels on the cabinet doors and mollycroft (raised area along the length of the ceiling as in a streetcar or gypsy wagon). The colors chosen for the paintings were based on paisley upholstery fabric.
The design and making of the light fixture and wood parts in the trailer (below left) is something we’ll talk about in a future blog post. The cabinets and doors, originally painted white, are beautiful, dark Philippine Mahogany (1956).
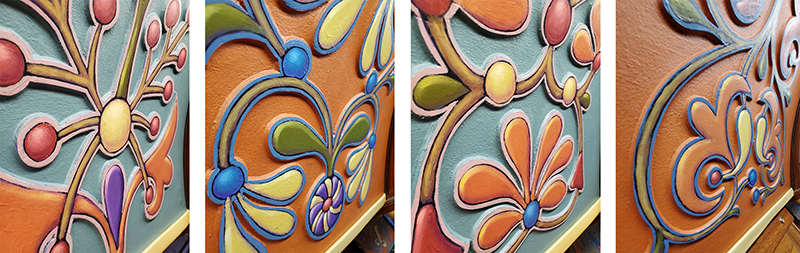
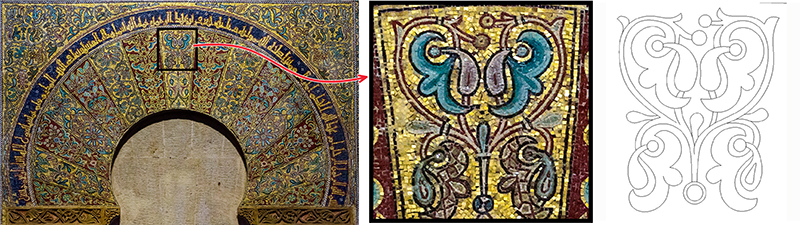
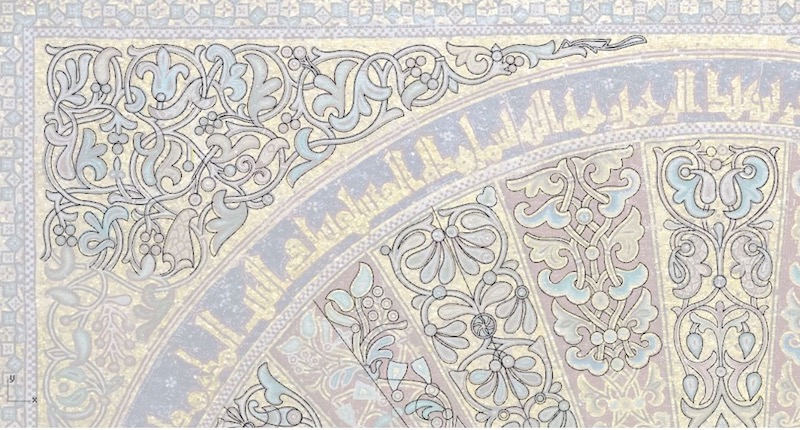
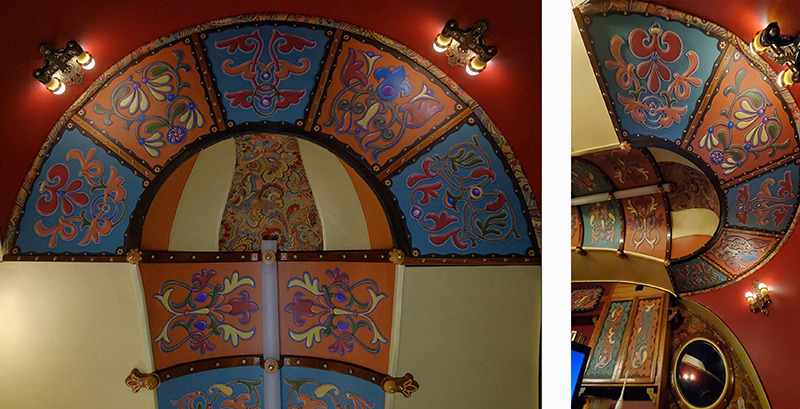
Our goal was to create unique and colorful surface designs for the ceiling and cabinet fronts. We were inspired by a specific mosaic archway in the Mosque of Cordoba in Spain which had very playful floral designs. We used this high-resolution photo, acquired from a stock photo site, as reference material.
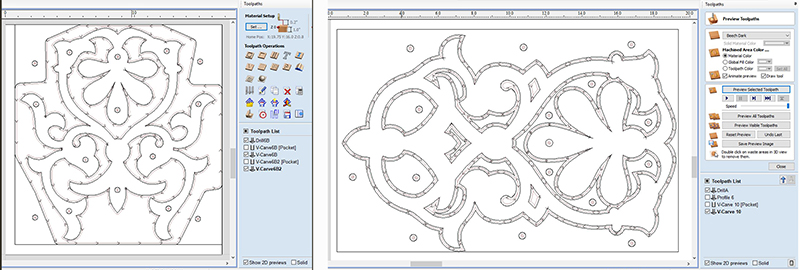
CAD outlines for panels: I used Rhino3D CAD to outline the designs, primarily using the “Curve: Interpolate points” tool. This allowed accurate replication of the curves and details. Adapting and editing designs is easy. The photo is placed on the CAD drawing board, made transparent, then locked. This allows the curves to be easily seen as they are drawn on top of the image.
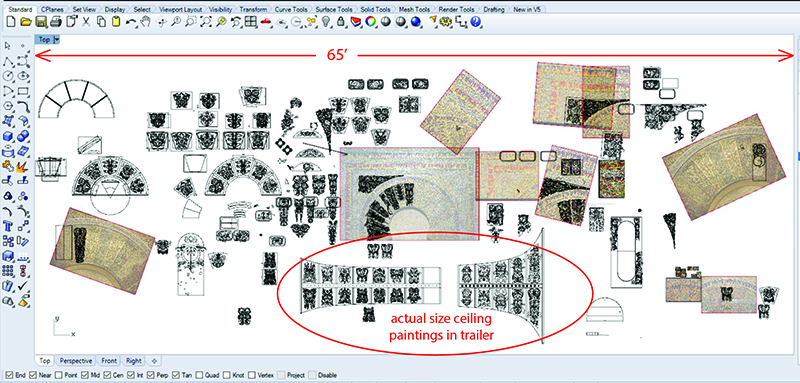
Using Rhino3D CAD for the entire project: My method of design is to play with many ideas and iterations on one drawing board. The screen grab below is of the actual “drawing board” for these Airfloat paintings. The screen grab above is from the center of the larger drawing below. The width of this overall drawing is 65’, but it is still easy with Rhino3D to work instantaneously on small details anywhere in this drawing. Also, it is easy to export a specific element, for example each panel in this project, to VCarve Pro using the “export selected” command for machining on the ShopBot Desktop tool.
I do all CAD work on a laptop using only the trackpad – no mouse. I have used Rhino3D this way for over 13 years, first with the Mac beta version, then transitioned to a Lenovo ThinkPad (PC) in 2014 upon acquiring the ShopBot Desktop. I had been a hardcore Mac user since the 1980s but came to the realization that there isn’t much difference in the operating systems when it comes to the programs we use.
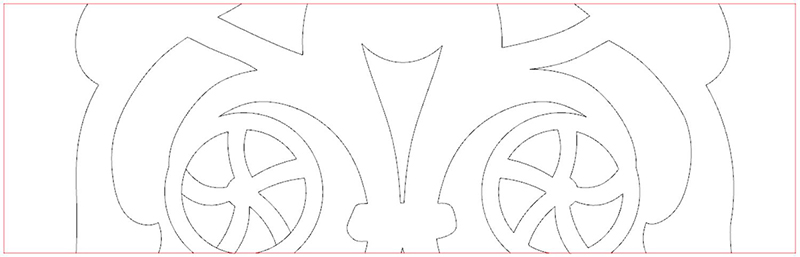
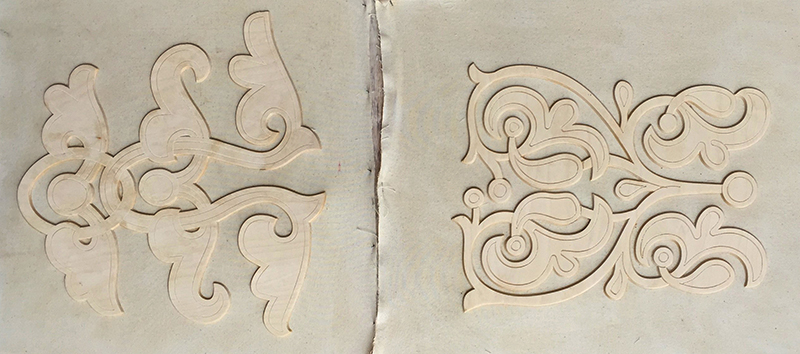
Cutting the panels for painting: The designs were cut out of 1/8”Lauan plywood using a 60 degree v-groove bit. Double stick tape was used for holding down the parts along with a few screws for added security. Two passes were used to cut the parts, reducing the force during cutting. VCarve Pro helped create the clean and sharp inside miters. The bevel cut makes the 1/8” ply look thicker and more substantial.
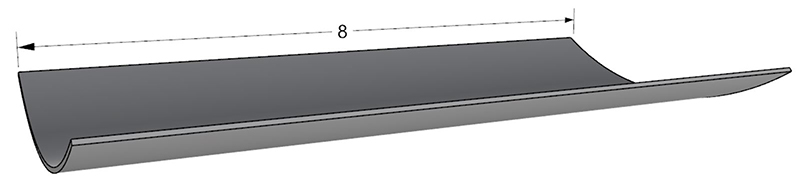
Plywood strategy: Using 1/8” Lauan plywood was inexpensive. It also has a relatively smooth surface and bends nicely. Our source for the material is Midway Plywood in Everett, WA. The trick to bending this plywood is working with the grain. Since many of the finished panels were to be bent to approximately a 38” diameter, the panels needed to be cut so the designs would bend in the correct direction. Plywood usually bends widthwise, not length-wise, as seen in this illustration.
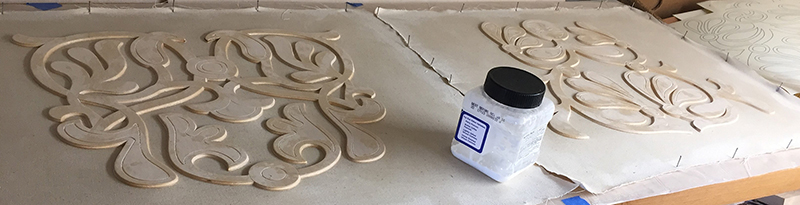
Gluing panels to canvas: The plywood parts were then adhered to stretched canvas with a very flexible glue called Flexbond, which is sold in theater supply stores, among other places.
Painting the panels: I used artist acrylics for defining the colors. Since there was so much surface area to be covered, we used a service at Lowe’s for custom mixing high-quality pint containers of 100% acrylic house paint for four dollars. These paints, with the addition of various acrylic mediums and glazes, essentially work the same as artist acrylics—at a fraction of the cost.
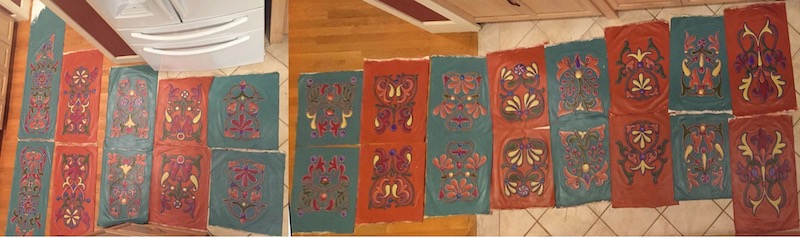
Laying out the order: Below are the mollycroft panels (19.5’ total) laid out on a kitchen floor.
Installing the painted panels in the trailer: Contact cement is our friend. We tried to use water-based contact cement but found that the solvent-based version was essential, especially for adhering to the curved ceiling panels. We were concerned with off-gassing but luckily didn’t move into the trailer until all off-gassing was complete.
Here is the view from the bed and bedroom ceiling:
Dinette ceiling:
Walter Dill – walter@dilluhlsional.com and/or Monica Uhl – monica@dilluhlsional.com
Toll Free: 1-888-680-4466
Phone: 919-680-4800
Fax: 919-680-4900
ShopBot Tools, Inc.
3333-B Industrial Drive
Durham, NC 27704
USA
Office Hours
Monday–Friday: 9am–5pm EST
After Hours Tech Support
Monday–Friday: 5pm–9pm EST
Saturday–Sunday: 10am–5pm EST
Office Closure
ShopBot Tools, Inc. is closed New Year’s Day, Memorial Day, July 4th, Labor Day,
Thanksgiving Day and the following Friday, and Christmas Eve and Christmas Day.
Outside of normal office hours, we regularly check for support requests,
email and phone messages. To make sure we can get back to you as soon as possible,
leave a phone number or return email address where you will be available.