


Enter keyword(s) to search Blogs
Click here to be taken to the original blog
Most Recent
Categories
Bobby Hartley with Brand 9 Signs in Jacksonville, Florida knew that the addition of CNC to his shop would change the nature of his business. When he purchased a ShopBot, he went all out: 5’ x 10’ cutting area, Automatic Tool Changer (ATC) with nine tool holders, dust collection, and a vacuum hold-down system that could be portioned into seven different zones.
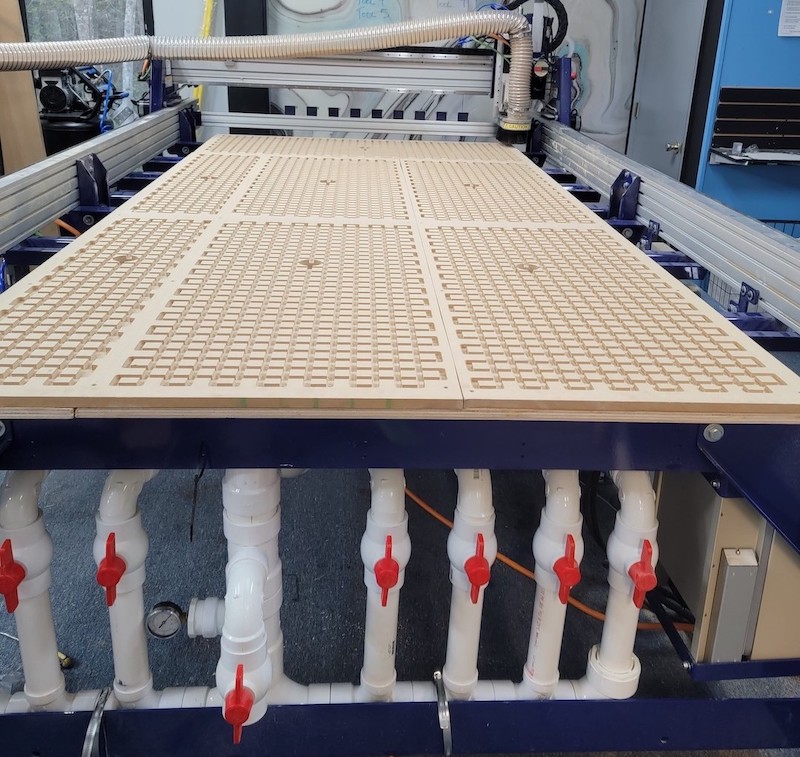
A machined plenum layer for a 5’ x 10’ PRSalpha tool with seven vacuum zones. By opening and closing valves in the manifold, the user can customize which areas of the table are under vacuum to hold material in place. To finish the vacuum hold-down set up, a bleeder board/sacrificial board layer is placed on top of the plenum.
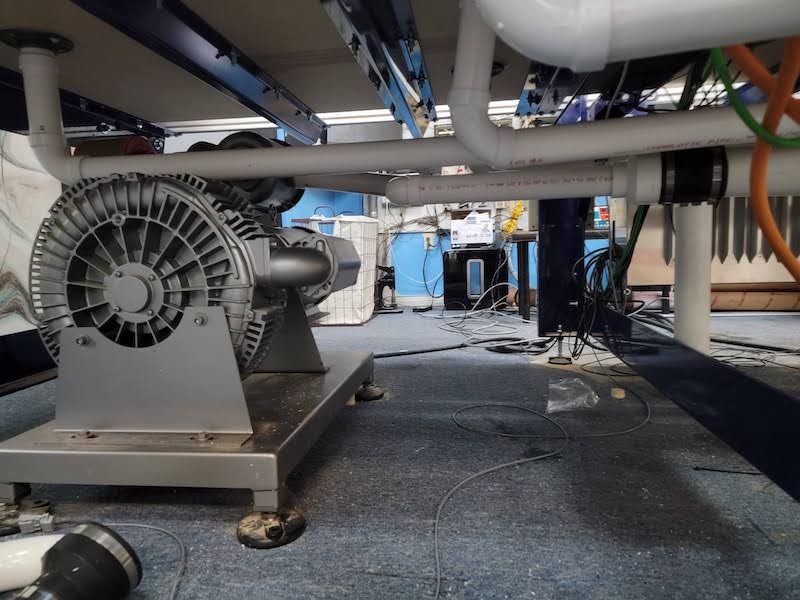
Plumbing under the table to a rotary pump pulls a vacuum through the solid MDF bleeder/sacrificial board to hold material in place while machining.
In early January 2022, Sallye Coyle arrived on site to begin the build of the tool and help Bobby and his CNC operator, Jeremy, get going with the ShopBot. Bobby had prepared for the install by having the electrical to the building in place, a computer dedicated to the ShopBot loaded with ShopBot Control Software, VCarve Pro CAD/CAM software installed on another computer, a compressor ready for the ATC, and supplies to create the plenum and bleeder board for the vacuum system. A ShopBot Starter Bit Kit was included in their initial order. Sallye suggested a few more bits once she learned what Bobby wanted to do and what materials he would be working with.
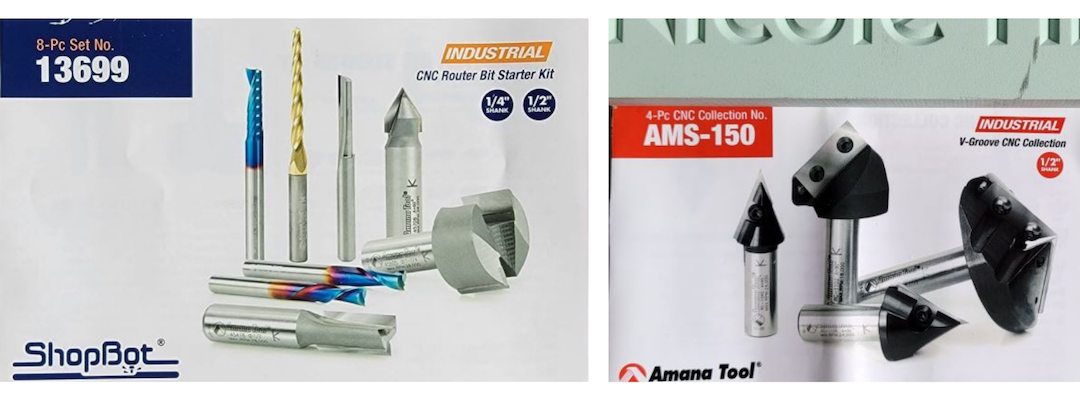
Left: The ShopBot Industrial starter bit kit includes options for surfacing the table, pocketing, profiling, V Carving and 3D carving in wood or plastics. Right: A sign maker intending to create different sized lettering/designs can benefit from an array of V bits with different geometries, as well as a few more options for pocketing and profiling toolpaths.
When the ShopBot build was complete, Bobby, Jeremy, and Sallye created a simple sampler of logos to run the ATC through its paces. The same design can be tool-pathed in different ways to create a different look. For example, an engraved sign will look different depending upon what angle V Bit is used to create the carving, and whether a second end mill bit is used to clear out selected areas. The advantage of an ATC is that the next bit will be picked up automatically when it is time for a bit change, instead of the operator having to pause the machine, change the bit and zero the Z, then resume the cut.
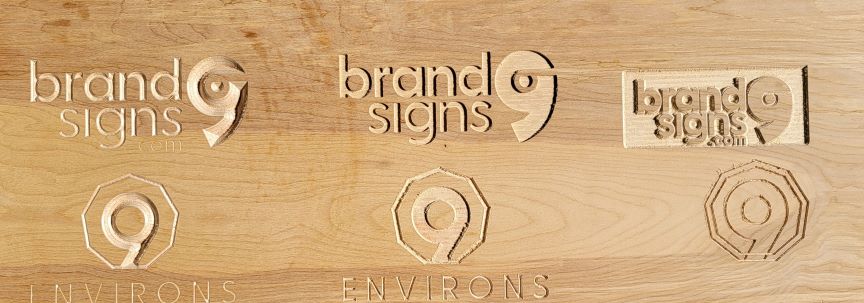
A 90 degree V bit (bottom left) will make a shallower cut than a 60 V bit (middle). With VCarve Pro CAD/CAM software, adding a flat depth will create beveled edges and a pocketed-out design. Selecting just the design vectors will create a look that plunges into the material (top middle). Selecting the design vectors and a border will create raised letters by pocketing away the background (top right).
For his first project, Bobby chose a not-so-simple project: a 48” x 28” map of Manhattan with the different neighborhoods delineated, and the name of each neighborhood engraved into the piece. While he had the artwork ready to go, it took some nudging of vector lines and toolpath options to achieve the desired result in simulations. Sallye spent several hours showing Bobby and Jeremy how to use VCarve Pro CAD/CAM software to get the right look.
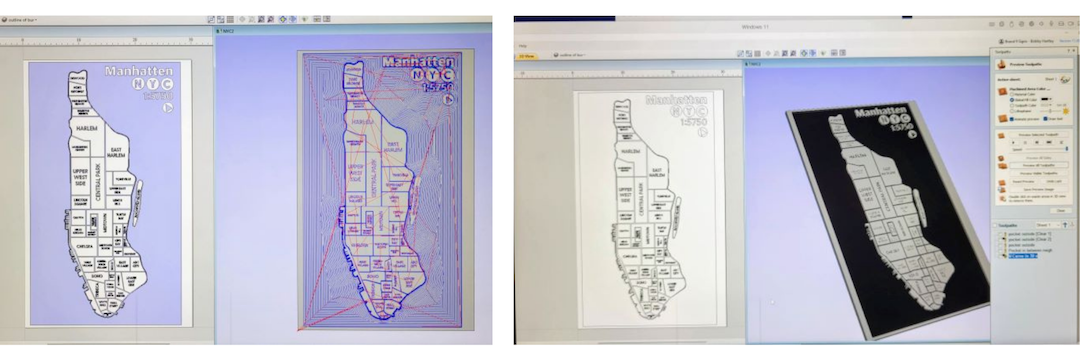
Screen shots of the map of Manhattan design and tool pathing options created in VCarve Pro CAD/CAM software.
Defining the location of each of the tool holders in the tool bar is part of the initial set up process for the ATC. During routine operations, the bits required for a project are loaded into the tool bar. The bit position in the tool bar (in this case, 1-9) corresponds to the tool number in the tool library in the CAM software. When the ShopBot code in the .sbp (ShopBot part) file signals that there is a bit change (the tool number changes), the ShopBot drops off the old bit and picks up the new bit. All bits are calibrated to set the Z zero at the surface of the table at the beginning of each workday to take the different lengths of bits into account.
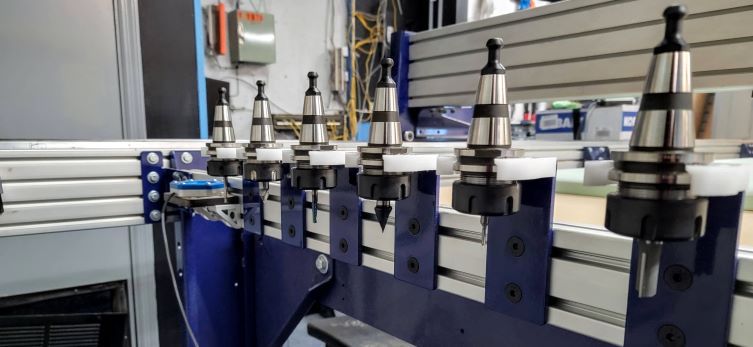
The tool bar is loaded with bits ready for machining. The routine to set the Z zero for each bit uses the proximity switch at the top of the Z axis and the pressure sensitive Z zero Plate at the end of the row.
Now the machining could begin on Bobby’s first project. Starting with a ½” straight bit, the areas around the islands were pocketed away. Finer details were then cut out with a ¼” end mill bit. Final details around the docks and in between the neighborhoods were finished up with an 1/8” end mill bit. Doing the pocketing with successively smaller bits reduced production time while still creating the desired detail. Finally, the lettering was engraved with a 30-degree V bit to get the depth necessary for the smaller text.
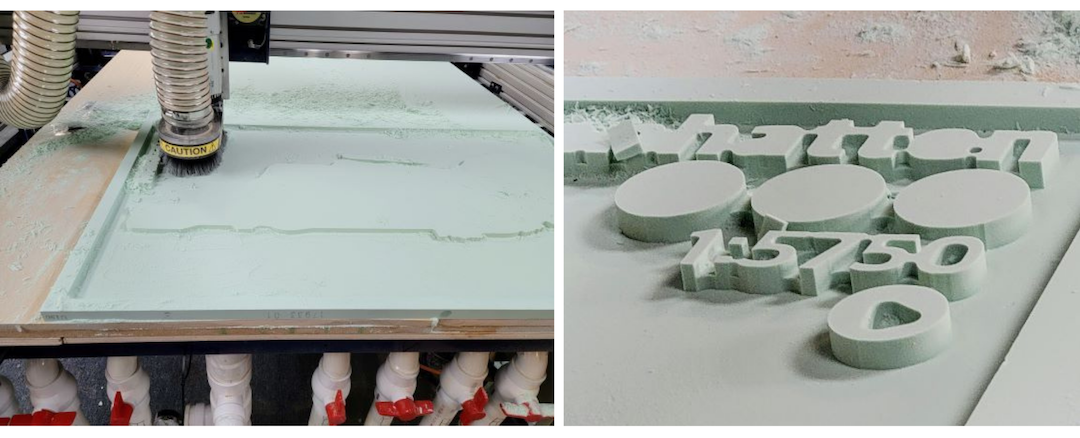
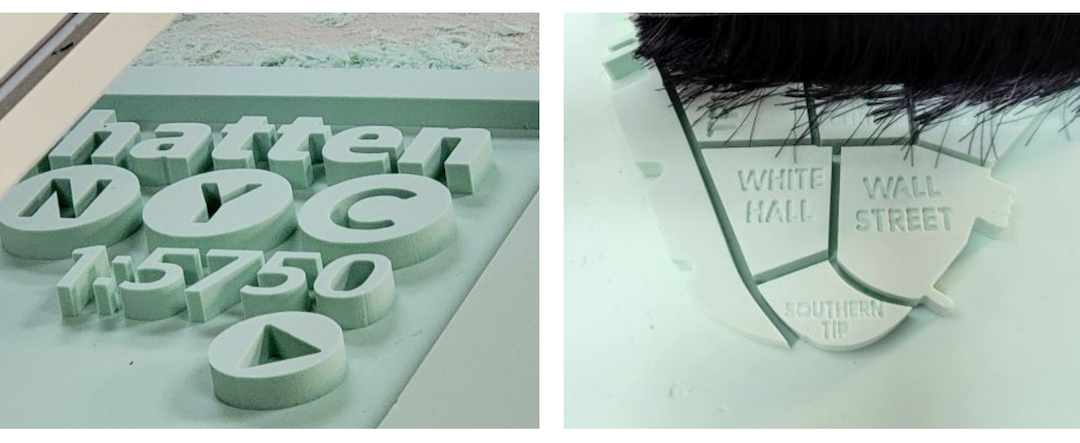
Four bits and three hours later, the machining was complete. Bobby intends to use colored epoxy to fill the pocketed areas, then paint the top layers and letters. Just hours after he posted an example of the map on his new website, he had orders for nine more! With the design and tool pathing done, he or Jeremy can now just load a new piece of material and let the ShopBot create the artwork while they tend to other aspects of their business.
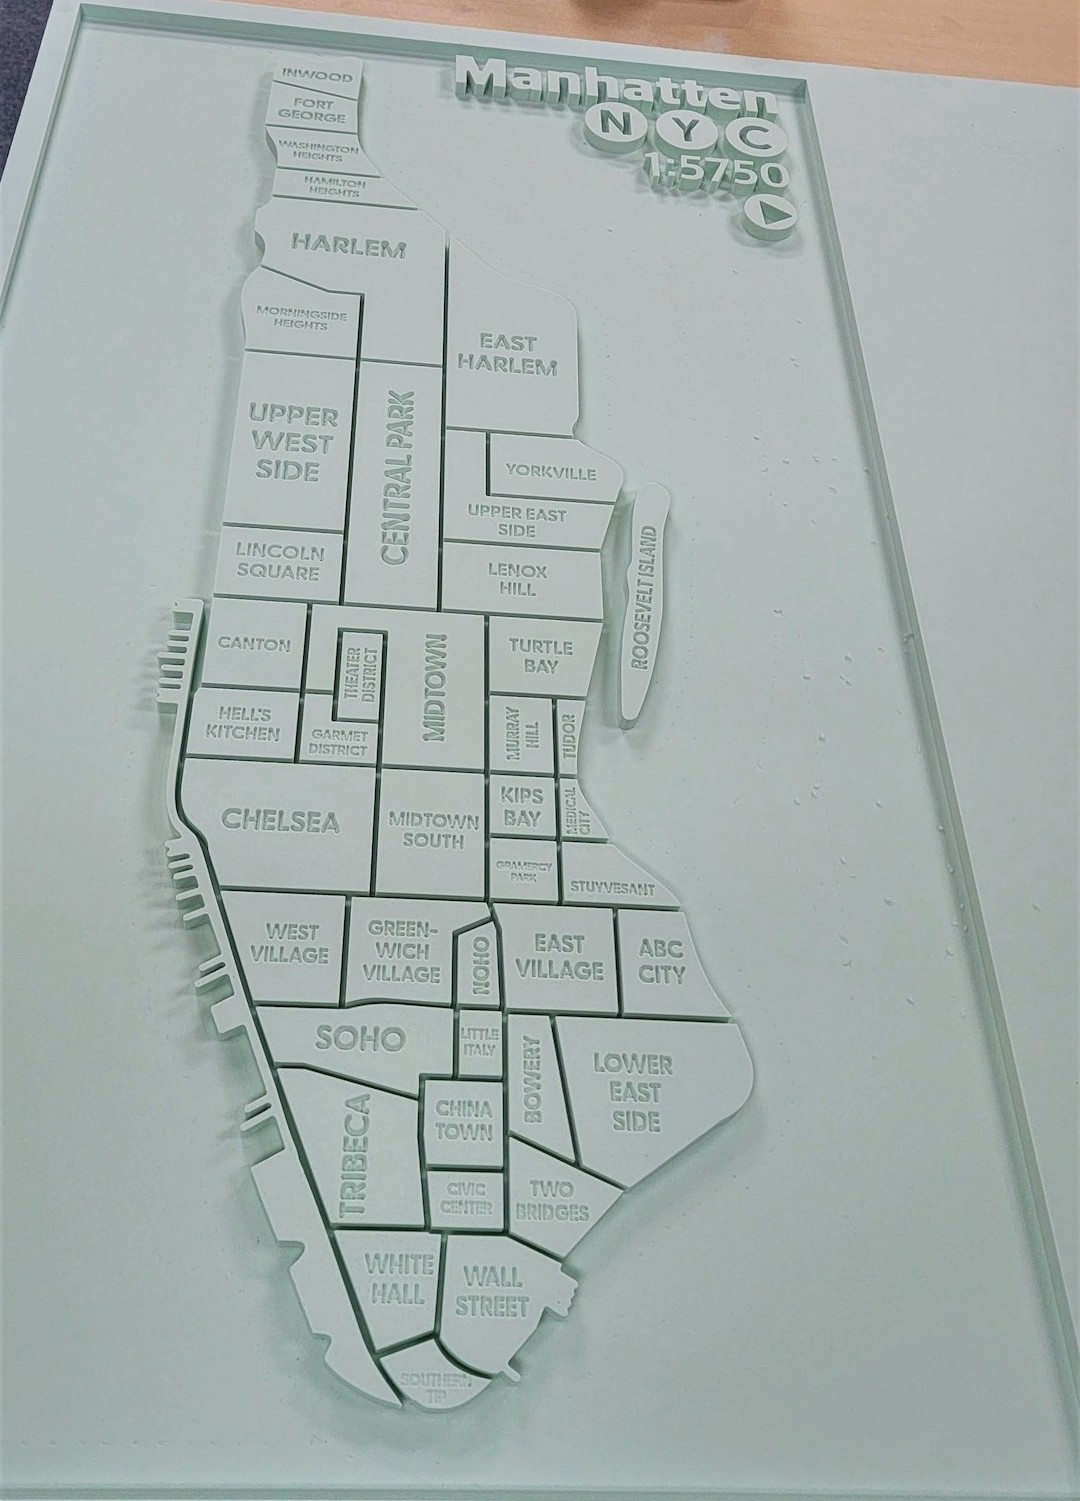
The final machined piece.
For Bobby Hartley, it was worth every penny to have a ShopBot tech on site to make sure the machine was set up properly. Sallye then spent several days giving customized training for designing, tool pathing, bit selection, and feeds/speeds. She continued to offer design and troubleshooting advice after she made her way back to her hometown of Portland. Bobby sent a photo of a project designed, tool-pathed and machined on his own, showing that he is well on his way to integrating ShopBot into his business model.
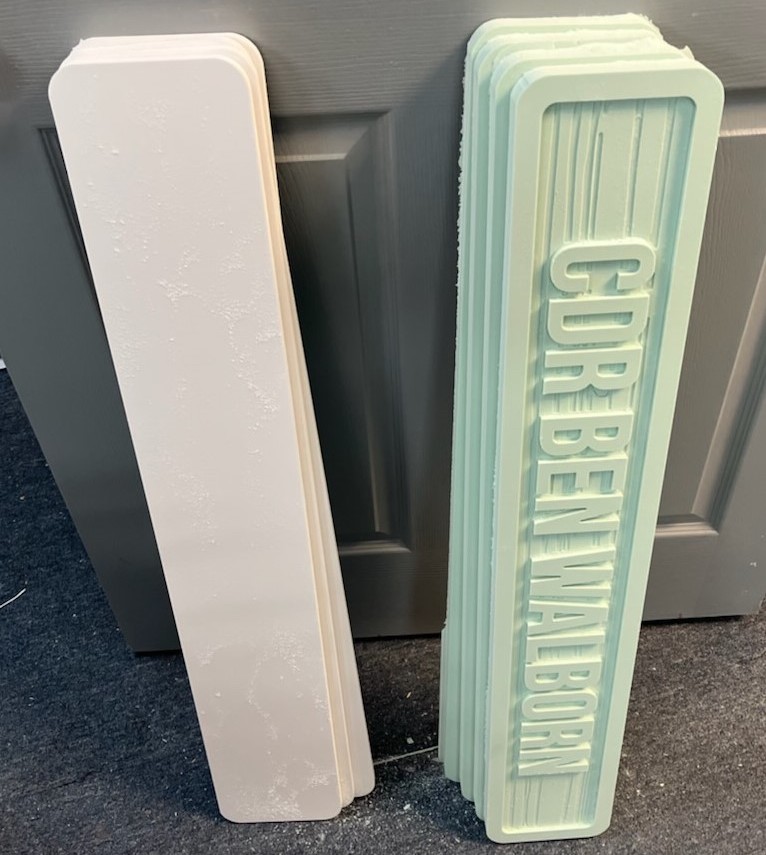
Signs machined on the ShopBot CNC mimic a sandblasted technique in a fraction of the time.
All other photos by Sallye Coyle
Toll Free: 1-888-680-4466
Phone: 919-680-4800
Fax: 919-680-4900
ShopBot Tools, Inc.
3333-B Industrial Drive
Durham, NC 27704
USA
Office Hours
Monday–Friday: 9am–5pm EST
After Hours Tech Support
Monday–Friday: 5pm–9pm EST
Saturday–Sunday: 10am–5pm EST
Office Closure
ShopBot Tools, Inc. is closed New Year’s Day, Memorial Day, July 4th, Labor Day,
Thanksgiving Day and the following Friday, and Christmas Eve and Christmas Day.
Outside of normal office hours, we regularly check for support requests,
email and phone messages. To make sure we can get back to you as soon as possible,
leave a phone number or return email address where you will be available.